Source: http://www.theguardian.com/lifeandstyle/2016/mar/22/nigel-slater-new-potato-and-spring-onion-frittata-recipe
Many people generically refer to any small potato as “new,” but there’s a lot more to it than that. New potatoes are those that have been freshly dug and brought to market without curing.
After harvest, most potatoes are stored for up to a couple of weeks to set the peel and heal any nicks or cuts, allowing them to last longer. Without this step, new potatoes are moister and seem sweeter, though with a slight, appealingly minerally bitterness in the finish.
Spring onions look similar to scallions, but you’ll notice that they have small onion bulbs at the base. These onions come from the varietals that produce bulbs and are basically more mature versions of scallions. They are planted as seedlings in the late fall and then harvested the next spring, thus the word “spring” in the name.
Spring onions are sweeter and mellower than regular onions, but the greens are more intense in flavor than scallions. The bulbs can be red or white, depending on the varietal, and while they can be used in much the same way as regular bulb onions, they are great grilled, roasted whole, or used like pearl onions.
The ingreditents
- 350g (just over 3/4 pound) New Potatoes
- 4 Tbsp olive oil
- 3 to 4 spring onions (fresh scallions can substitute)
- 4 eggs
- 1 tsp chopped fresh tarragon
- Salt and Pepper
The recipe
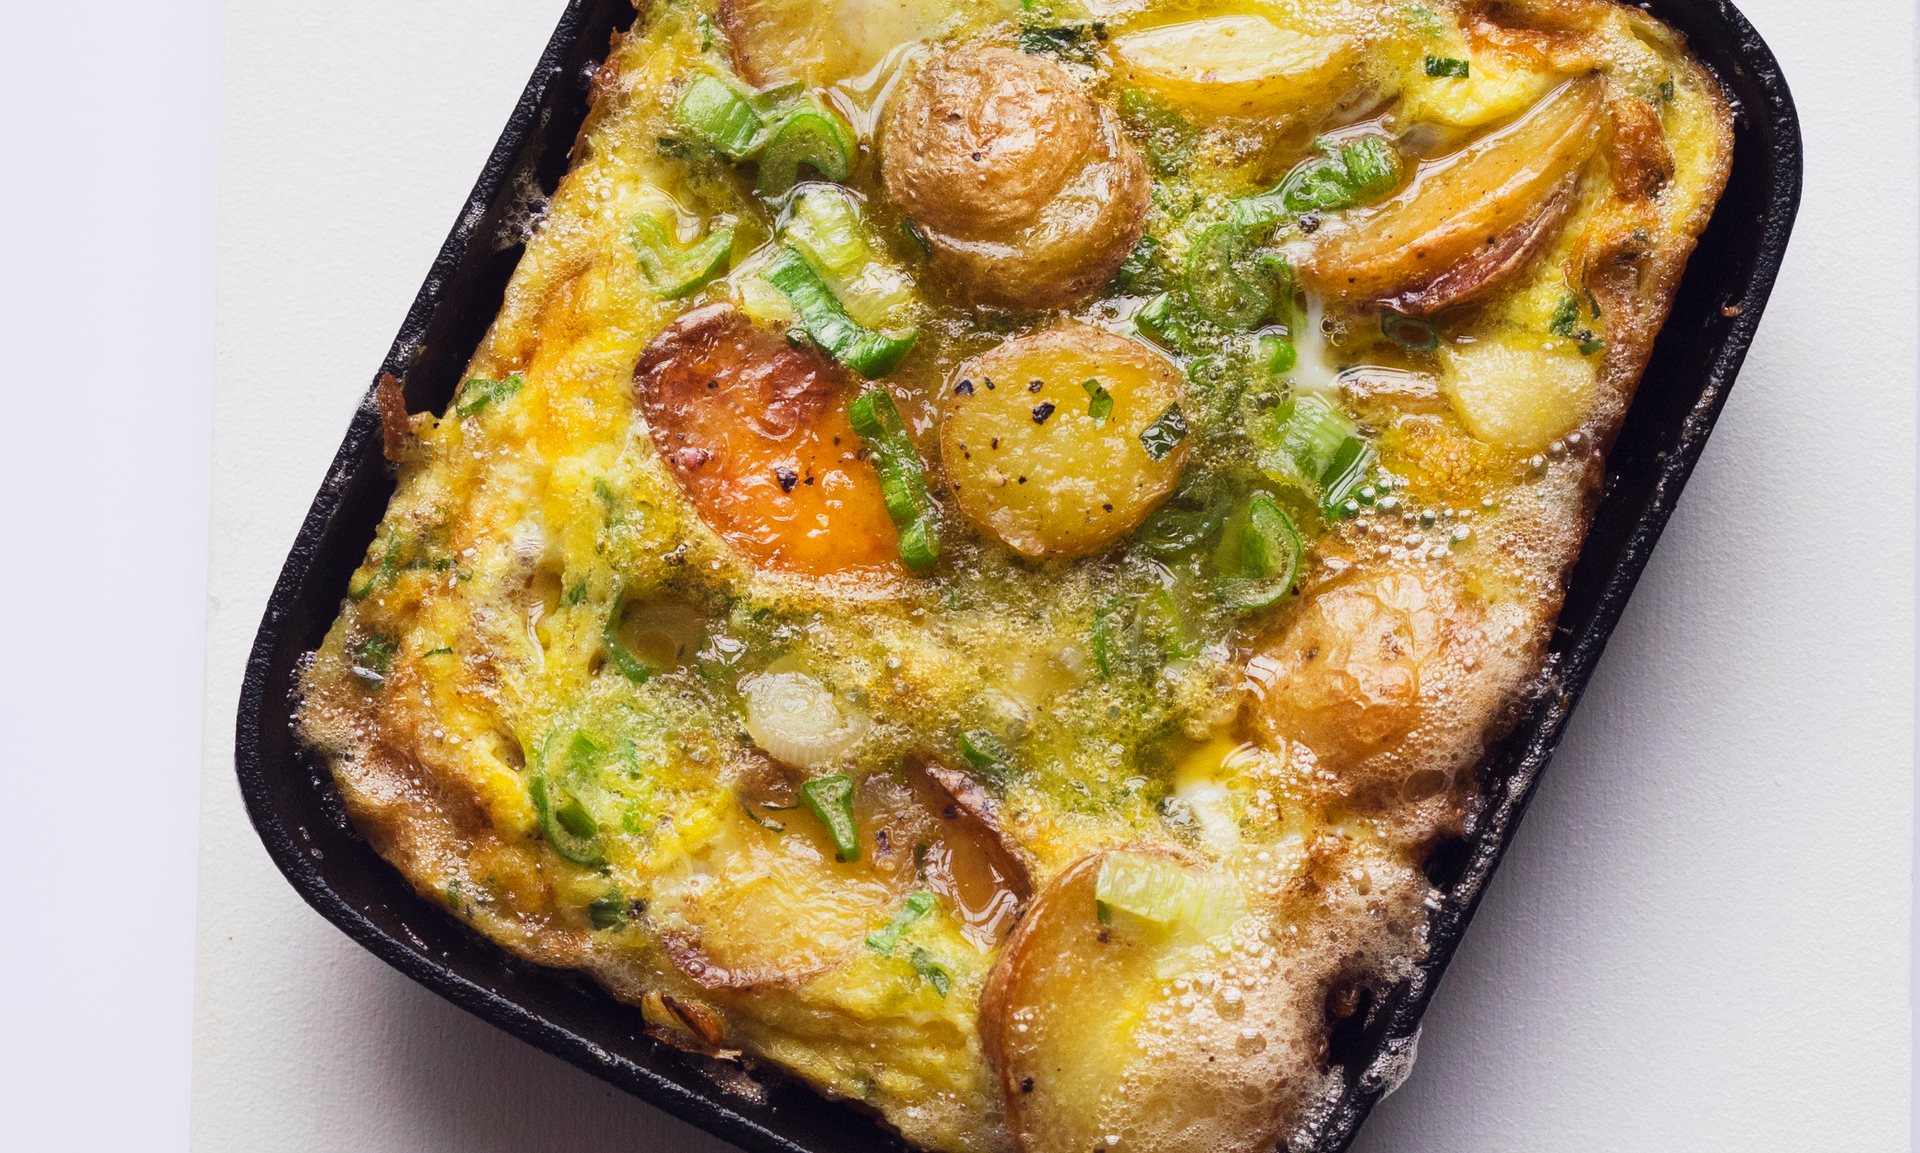
Wash 350g of new potatoes and cut them into thin coins. Each slice should be about 2cm in width. Warm 4 tbsp of olive oil in a nonstick frying pan and fry the potatoes until pale gold on each side. Keep the heat fairly low to give the potatoes a chance to cook through to the middle. If they are browning too quickly, lower the heat and cover with a lid.
Chop the white and most tender green parts of 3 spring onions and add to the potatoes, letting them soften for a few minutes until they are tender.
Turn the oven grill on. Whisk 4 eggs lightly, season with both salt and black pepper and 1 tsp of chopped tarragon. Tip the beaten egg into the pan with the potatoes and onions and leave to cook over a low heat until the eggs have formed a tender crust around the outside. The center will still be almost liquid.
Place the pan under the heated oven grill for 2 or 3 minutes until the eggs have lightly set. Leave for a moment or two to calm down, then slice and serve. Serves 2.
The trick
The texture of your finished frittata will depend on both the time and speed with which it is cooked. Keep the heat quite low so the outside edges don’t cook too quickly.
The twist
You can include any spring vegetable in a frittata – asparagus, lightly steamed, is wonderful. You could also incorporate small mushrooms, and lightly fried or steamed long-stemmed broccoli.